How to Read an Analog Amp Volt Meter Accurately
Electrical measurement is an essential part of monitoring and maintaining electrical systems. Whether used in industrial machinery, control panels, generators, or distribution systems, meters help operators understand the voltage and current flowing through equipment. Among the traditional instruments used for this purpose, an Analog Amp Volt Meter remains a practical and reliable choice.
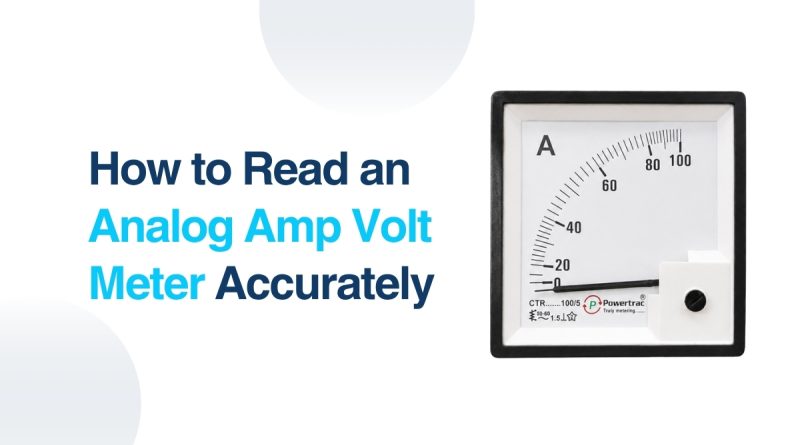
Unlike digital meters that display measurements as numerical values, an analog meter uses a pointer that moves across a graduated scale. Reading this pointer correctly requires some attention to the selected range, scale markings, and pointer position. Learning how to read the meter accurately can help prevent measurement errors and improve electrical safety.
This guide explains how an analog amp volt meter works, how to read its scales correctly, common mistakes to avoid, and how it compares with modern digital panel meters.
What Is an Analog Amp Volt Meter?
An Analog Amp Volt Meter is an electrical measuring instrument designed to indicate voltage, current, or both. Depending on the model and application, it may function as an ammeter, voltmeter, or combination ampere-voltage meter.
The instrument contains a moving pointer that responds to the electrical quantity being measured. When current or voltage is applied, the pointer moves across a calibrated scale and indicates the corresponding value.
Analog meters are commonly installed in:
- Electrical control panels
- Industrial machinery
- Generators
- Power distribution systems
- Motor control panels
- Manufacturing equipment
- Automation systems
- Electrical testing setups
Their simple visual display makes them useful for continuously monitoring changing electrical values.
Understanding the Meter Scale
The first step in reading an analog meter accurately is understanding its scale. The meter face usually contains one or more graduated scales. Each scale consists of numerical markings divided into smaller intervals.
For example, a meter may have a scale ranging from 0 to 10, while its selected measurement range could be 0 to 100 volts. In this situation, the pointer reading must be converted according to the selected range.
Before taking a measurement, identify:
- The quantity being measured
- The selected range
- The correct scale
- The smallest divisions between major markings
- The position of the pointer
Never assume that the largest number printed on the meter is automatically the value you should read.
Step 1: Identify Whether You Are Measuring Voltage or Current
An amp volt meter may have separate terminals, switches, or selector settings for voltage and current measurement.
Voltage measures the electrical potential difference between two points, while current measures the flow of electric charge through a circuit.
Before reading the instrument, check the meter’s markings and configuration. Make sure the meter is connected and configured correctly for the parameter you intend to monitor.
Using the wrong setting can produce an incorrect reading and, in some situations, damage the instrument.
Step 2: Check the Selected Measurement Range
Many analog meters offer multiple ranges. A meter could, for example, provide voltage ranges of 10 V, 50 V, 100 V, 250 V, or 500 V.
The selected range determines how the scale should be interpreted.
Suppose the meter has a 0–10 scale and the selected range is 100 V. If the pointer is at 6, the actual reading would be:
6 ÷ 10 × 100 = 60 V
Similarly, if the selected range is 50 V and the pointer is at 6:
6 ÷ 10 × 50 = 30 V
Therefore, always identify the range before calculating the final reading.
Step 3: Choose the Correct Scale
Some analog meters have several scales printed on the same dial. This allows one instrument to be used for different measurement ranges.
For example, you might see 0–10, 0–50, and 0–100 scales. Select the scale that corresponds to your measurement range.
Using the wrong scale is one of the most common causes of incorrect readings.
If the selected range is 100 V and you accidentally read the 0–50 scale, the displayed value will not represent the actual voltage.
Step 4: Count the Small Divisions
After selecting the correct scale, determine the value represented by each small division.
For example, imagine a 0–10 scale divided into 50 equal intervals.
The value of each division is:
10 ÷ 50 = 0.2 units
If the pointer is positioned at 6.4 on the scale, the corresponding measurement on a 100 V range would be:
6.4 ÷ 10 × 100 = 64 V
Taking a moment to calculate the smallest division can significantly improve reading accuracy.
Step 5: Look Straight at the Pointer
Parallax error is another important factor when reading an analog meter.
Parallax occurs when you look at the pointer from an angle instead of directly in front of the scale. The pointer may appear to line up with a different marking depending on your viewing position.
To minimize this error:
- Position your eyes directly in front of the pointer.
- Keep your line of sight perpendicular to the meter face.
- If the meter has a mirrored scale, align the pointer with its reflection.
- Avoid reading the meter from the side.
Many quality analog panel meters include a mirror behind the scale specifically to help reduce parallax errors.
Step 6: Read the Pointer Position Carefully
Once the correct scale and range have been identified, observe where the pointer sits.
If it falls exactly on a numbered marking, the reading is straightforward. If it falls between two markings, estimate its position based on the smaller divisions.
For example, if the pointer lies between 5 and 6 and there are ten equal subdivisions, each small division represents 0.1. A pointer positioned around the fourth subdivision would indicate approximately 5.4 on that scale.
The more carefully you interpret these divisions, the more consistent your readings will be.
Reading an Analog Amp Volt Meter for Panel Applications
An Analog Amp Volt Meter for Panel is commonly used to monitor electrical parameters directly from a control or distribution panel.
Panel-mounted meters are especially useful where operators need to observe electrical conditions continuously without connecting a portable testing instrument each time.
When reading a panel meter, first identify the label or selector switch associated with the measurement. In three-phase electrical systems, for example, the meter may be connected through a selector switch that allows the operator to monitor different phases.
The correct reading procedure remains the same:
Identify the parameter → Check the range → Select the correct scale → Read the pointer → Convert the value if necessary.
Always follow the equipment manufacturer’s instructions and electrical safety procedures when working around energized panels.
Common Mistakes When Reading Analog Meters
Even a properly functioning meter can produce misleading results if it is read incorrectly. Some common mistakes include:
Using the Wrong Scale
Multiple scales can make analog meters confusing. Always match the scale with the selected range.
Ignoring the Range
A pointer reading is not necessarily the final measurement. The selected range may require you to convert the scale reading.
Reading from an Angle
Viewing the pointer from the side can introduce parallax error. Read the instrument straight on.
Estimating Too Quickly
Small scale divisions matter. Avoid rounding the reading unnecessarily when a more precise estimate is possible.
Ignoring Zero Position
Before taking a measurement, check whether the pointer returns to the correct zero position. A mechanical zero adjustment may be necessary on some analog instruments.
Measuring Outside the Intended Range
Selecting an inappropriate range can lead to inaccurate readings and may damage the meter. When uncertain, use a suitable higher range first and then move to a lower range if appropriate and safe.
Analog Amp Volt Meter vs Digital Panel Meter
Although analog instruments continue to have useful applications, digital meters have become increasingly popular because they provide numerical displays.
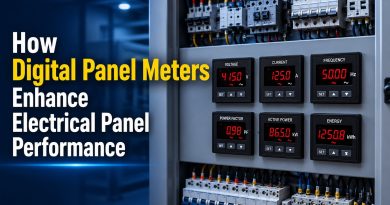
A Digital Panel Meter for Electrical Panel typically presents the measured value directly on an LED or LCD display. This can make readings easier to interpret, particularly where operators need quick numerical information.
Analog Meter Advantages
- Simple visual indication
- Easy to observe changing values
- No dependence on a digital display
- Familiar design for many industrial applications
- Useful for continuous monitoring
Digital Meter Advantages
- Direct numerical display
- Easier interpretation for precise values
- Often supports multiple electrical parameters
- Can include additional monitoring features
- Useful for modern control and automation systems
The choice between analog and digital technology depends on the application, required accuracy, installation environment, and monitoring requirements.
How to Improve Reading Accuracy
To obtain more reliable readings from an analog meter, consider the following practices:
Read at eye level: This reduces parallax error.
Select the appropriate range: Use a range suitable for the expected electrical value.
Understand the divisions: Know what each small marking represents.
Inspect the instrument: Damaged glass, loose pointers, faded scales, or mechanical problems can affect readability.
Check calibration: Periodic calibration or verification helps ensure the instrument continues to provide dependable measurements.
Avoid unnecessary electrical exposure: When working with energized equipment, follow appropriate electrical safety procedures and only allow qualified personnel to perform tasks that require exposure to hazardous voltages.
Why Analog Meters Are Still Used
Despite the growth of digital measurement technology, analog meters continue to have a place in electrical and industrial applications. Their moving pointer provides a visual representation of changing electrical values, allowing operators to notice fluctuations quickly.
For certain control panels and machines, a traditional analog display may also be preferred because of its straightforward operation and familiar appearance.
However, applications requiring highly precise numerical measurements, data logging, communication, or advanced monitoring may benefit from modern digital instruments.
Conclusion
Learning how to read an Analog Amp Volt Meter accurately is a valuable skill for anyone involved in electrical monitoring. The process mainly involves identifying the measurement type, checking the selected range, choosing the correct scale, understanding its divisions, and reading the pointer from the correct viewing angle.
For industrial and control-panel applications, an Analog Amp Volt Meter for Panel can provide a simple and continuous indication of electrical conditions. At the same time, a Digital Panel Meter for Electrical Panel may be a better choice when direct numerical readings and advanced monitoring features are required.
Whether choosing an analog or digital instrument, accurate measurement depends not only on the meter itself but also on correct installation, suitable range selection, proper reading techniques, and regular maintenance or calibration. Understanding these fundamentals can help improve measurement reliability and support safer electrical system monitoring.
FAQs
1. What is an Analog Amp Volt Meter?
An Analog Amp Volt Meter is an electrical measuring instrument used to measure voltage and current. It uses a moving pointer and calibrated scale to display the measured electrical value.
2. How do you read an Analog Amp Volt Meter accurately?
First, identify whether you are measuring voltage or current. Then check the selected range, choose the corresponding scale, count the smallest divisions, and read the pointer while viewing the meter straight on.
3. What is an Analog Amp Volt Meter for Panel?
An Analog Amp Volt Meter for Panel is designed to be installed directly into electrical control panels, distribution panels, generators, and industrial equipment for continuous monitoring of voltage or current.
4. Why does an analog meter have multiple scales?
Multiple scales allow the same meter to measure different ranges. You should always select the scale that corresponds to the range chosen on the meter.
5. What is parallax error in an analog meter?
Parallax error occurs when the meter is viewed from an angle, causing the pointer to appear at a different position on the scale. Looking directly at the meter face helps minimize this error.
6. How do you calculate the actual reading from an analog meter?
If the meter uses a 0–10 scale, divide the pointer reading by 10 and multiply it by the selected range. For example, a pointer reading of 6 on a 100 V range represents approximately 60 V.